Run Anemos in Command Line Mode
Preface
Anemos can be run in different modes, including the command-line interface (CLI) and the graphical user interface (GUI). This tutorial will guide you through the steps to run Anemos in CLI mode, suitable for advanced users.
The Anemos Mainnet has not launched: there are no public peers and no public RPC endpoint, so a node started without a network flag (which defaults to Mainnet) will find no peers and never sync. The only live network today is the Testnet. This guide therefore uses the
–testnet flag throughout. Mainnet commands are shown for
completeness but will not connect until launch.Prerequisites
Before proceeding with the steps below, ensure that you have the following:
- A computer running Windows, macOS, or Linux
- Suitable internet connection
Download
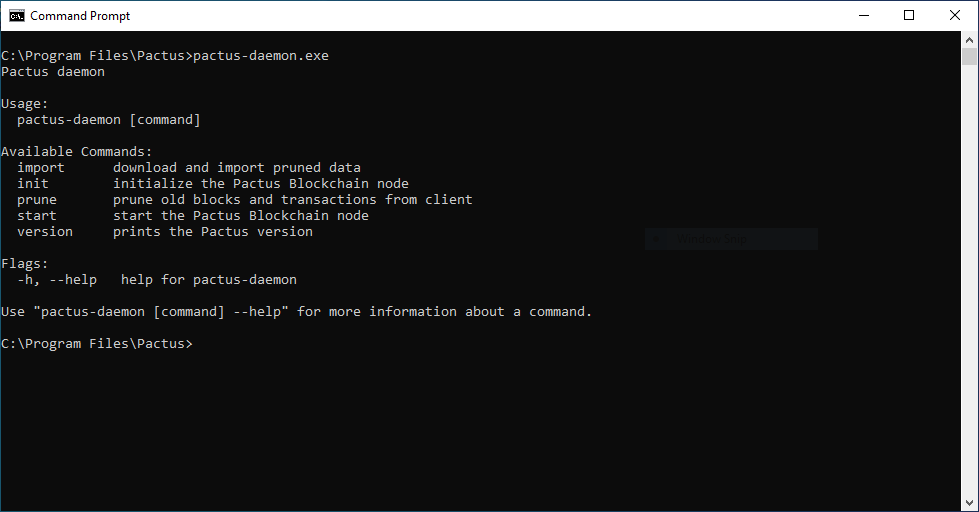
To get started, download and extract the Anemos CLI file from here. Once you have downloaded and extracted the Anemos CLI file, you can proceed to the next step.
Initializing the Node
Now you need to create a wallet and setup a working directory for your node. A working directory is a place where you save blockchain data and wallets. Open the Terminal and run the following command:
./anemos-daemon init --testnet -y --val-num 1 -p <password>This command creates your wallet and setup the working directory at ~/anemos, configured
for the Testnet (the only live network — see the note above). The -y flag only answers the
seed-phrase confirmation prompt automatically; it does not set the wallet password and does
not choose the validator count. Pass your chosen wallet password with -p <password> (replace
<password>) and the number of validators with --val-num <N> — otherwise init will stop and
interactively prompt you for each. The example uses --val-num 1 for a simple single-validator
node; see the note below to run more.
anemos-daemon.exe init --testnet -y --val-num 1 -p <password>This command creates your wallet and setup the working directory at C:\Users\<USER_NAME>\anemos,
configured for the Testnet (the only live network — see the note above). The -y flag only
answers the seed-phrase confirmation prompt automatically; it does not set the wallet password
and does not choose the validator count. Pass your chosen wallet password with -p <password>
(replace <password>) and the number of validators with --val-num <N> — otherwise init will
stop and interactively prompt you for each. The example uses --val-num 1 for a simple
single-validator node; see the note below to run more.
The
-p <password> flag sets your wallet password non-interactively. If you omit it,
init will pause and prompt you to choose (and confirm) a wallet password before it
continues. Either way, remember this password: it is required every time you start the node or use the
wallet.–val-num)The
–val-num <N> flag sets how many validators the node creates (range 1–32;
each can stake up to 60,000 ANM, the launch cap, supply-indexed at runtime). It is separate from -y: -y only
auto-answers the seed-phrase confirmation, so without –val-num the init
command still pauses and prompts you for the validator count — which fails in a non-interactive shell.
Pass –val-num (e.g. –val-num 1 for a single validator) to make
init fully non-interactive.Omitting the network flag initializes for Mainnet (
./anemos-daemon init).
Mainnet is not launched, so such a node will not find peers or sync today. Use
–testnet as shown above until Mainnet launches.By default the working directory that stores the blockchain data is located at
~/anemos in Unix-like systems.
For Windows it stores in C:\Users\<USER_NAME>\anemos.If you wish to select or specify a different path, use the
--working-dir option.Always keep a paper backup of your seed phrase in a safe and secure location. If someone gains access to your seed phrase, they can gain full control over your wallet and funds.
The working directory contains:
- Default wallet
- Genesis file
- Config file
Feel free to explore the contents of these files as needed, particularly the config file. The config file contains parameters that can customize your node.
Restoring the Node
If you ever need to restore your node, for instance on a new device,
you can use the --restore option followed by your mnemonic:
./anemos-daemon init --testnet --restore "<your-mnemonic>"Replace <your-mnemonic> with your previously noted mnemonic phrase.
This command will restore your wallet in the ~/anemos directory.
anemos-daemon.exe init --testnet --restore "<your-mnemonic>"Replace <your-mnemonic> with your previously noted mnemonic phrase.
This command will restore your wallet in the C:\Users\<USER_NAME>\anemos directory.
Importing data (Optional)
To speed up the syncing process, you can optionally import a snapshot of the blockchain from a centralized server. This will start your node in Pruned Mode:
./anemos-daemon importanemos-daemon.exe importImport is an optional fast-sync convenience, not a required step. The default snapshot host (
snapshot.anemos.one) may not yet be serving a live snapshot. If import fails
or no snapshot is available, you can either point it at a snapshot host you trust with
–server-addr <url>, or simply skip this step and let the node sync from the network
normally (run start directly).Anemos supports Pruned Mode. In this mode, you don’t need to download the entire blockchain; instead, you can download recent blocks from the last 10 days. This significantly speeds up the syncing process.
Running the Node
Now you can start the node and sync with the network. Run the following command in the Terminal:
./anemos-daemon startanemos-daemon.exe startYou don’t pass a network flag to
start: the node joins whichever network you
selected with init (it is baked into the genesis.json in your working
directory). Since you ran init –testnet above, start joins the live
Testnet. To target a different network, re-run init in a fresh working directory.When the Anemos node starts running, it begins syncing with the network. This process may take some time, as your node needs to download and verify the entire blockchain history. Please be patient while your node syncs.
Default Ports
The default network ports in Anemos are defined as follows. It is not recommended to change these default ports:
- P2P port is
22888on Mainnet (and22777on Testnet). P2P supports both UDP and TCP protocols. - gRPC port is
50051on Mainnet; a locally-run Testnet node listens on50052(the cloud testnet overrides this back to50051). The gRPC module is enabled by default for localhost. - gRPC-gateway port is
8080. The gRPC-gateway is disabled by default. - JSON-RPC port is
8545. The JSON-RPC service is disabled by default. - Nanomsg port is
40899. The Nanomsg service is disabled by default.
Since this guide uses --testnet, your local node’s gRPC will be on localhost:50052 —
point clients such as anemos-shell there (e.g. --server-addr localhost:50052).
Running Anemos in the Background
To run Anemos commands in the background and keep them running even after you close your terminal or log out, you can use terminal multiplexer software. Terminal multiplexers allow you to create and manage multiple terminal sessions within a single window.
Two popular terminal multiplexer options are:
tmux: Tmux is a terminal multiplexer that lets you create, manage, and detach terminal sessions. You can install tmux on Unix-like systems using your package manager (e.g.,
apt,brew,yum).Here’s how to use tmux to run Anemos in the background:
- Start a new tmux session:
tmux - Run your Anemos command within the tmux session.
- Detach from the tmux session: Press
Ctrl-b, followed byd. - Reattach to the tmux session later to check the progress:
tmux attach-session
- Start a new tmux session:
screen: GNU Screen is another terminal multiplexer that allows you to run terminal sessions in the background.
Here’s how to use screen to run Anemos in the background:
- Start a new screen session:
screen - Run your Anemos command within the screen session.
- Detach from the screen session: Press
Ctrl-a, followed byd. - Reattach to the screen session later to check the progress:
screen -r
- Start a new screen session:
Choose the terminal multiplexer that suits your preference and install it using your system’s package manager. With these tools, you can run Anemos commands in the background with ease.