Run Anemos in Graphic Mode
Preface
Anemos can be run in different modes, including the command-line interface (CLI) and the graphical user interface (GUI). This tutorial will guide you through the steps to run Anemos in GUI mode, suitable for beginner to advanced users.
The Anemos Mainnet has not launched: there are no public peers and no public RPC endpoint, so a node that targets Mainnet will find no peers and never sync — it will sit forever on the “Syncing” screen showing a zero balance. The only live network today is the Testnet.
The installed desktop launcher (Start menu / Applications shortcut, or the AppImage’s desktop entry) starts the GUI with
–testnet automatically, so a normal click connects to
the live Testnet — you don’t need to do anything. If you instead launch the GUI binary
manually from a terminal, pass the flag yourself:./anemos-gui –testnetRunning
anemos-gui with no flag defaults to the unlaunched Mainnet,
which has no peers and will appear stuck at “Syncing”. The network is chosen the first time the
wizard creates a wallet and is then baked into your working directory, so always start with
–testnet (or the desktop shortcut) until Mainnet launches.Anemos ships a pre-built desktop GUI for Windows, macOS and Linux — the GTK app — plus the Anemos Android app. Download them all from anemos.one/download (the
#gui section);
the page lists the exact installers and architectures for each platform (it is the source of truth).
You do not need to build anything from source to run the graphical node.If you’d rather run Anemos without a GUI, the Run Anemos in Command Line Mode guide covers the same node on the command line — the CLI is published for many operating systems and architectures at anemos.one/download/#cli.
Building the desktop GUI from source is an optional path for developers or unsupported architectures — see Alternative: build the desktop GUI from source below. The wizard walkthrough further down this page applies to the GUI however you obtain it (a downloaded desktop bundle, a self-built binary, or the Android app’s onboarding flow).
Prerequisites
Before proceeding, ensure that you have the following:
- For the Android app: a phone running Android, plus a suitable internet connection.
- For the desktop GUI: a computer running Windows, macOS, or Linux, plus a suitable internet connection. Download the pre-built GUI from anemos.one/download, or — optionally — build it from source (you’ll then also need the Go toolchain and the GTK build dependencies; see the install guide below).
Android (graphic mode)
The Anemos Android app is available at anemos.one/download
(an .apk). It runs the real Anemos node on-device — and can run a full node: at setup you
pick the Node Type (full or pruned/light), with pruned/light the phone-friendly default. It walks you
through the same wallet-creation wizard described below. It is one of the supported graphical ways to
run Anemos — see Desktop GUI below for Windows, macOS and Linux.
Download the .apk from the download page and install it on your phone. Once installed, open the app
and follow the on-screen onboarding (the same steps covered in Initializing below).
Desktop GUI (Windows, macOS, Linux)
The pre-built Anemos desktop GUI — the GTK app — is available at anemos.one/download for Windows, macOS and Linux. The download page lists the exact installer or bundle for each platform and architecture (for example a Windows installer, a macOS disk image, and a Linux AppImage); use it as the source of truth so you always get the right build for your machine.
Download the bundle for your platform, install or unpack it, and launch it. The wizard walkthrough
below then applies. (When launching the GUI binary manually from a terminal, remember to pass
--testnet — see the note at the top of this page.)
If you’d rather run the node without a GUI, the Run Anemos in Command Line Mode guide covers the same node on the command line; the CLI is published for many OSes and architectures at anemos.one/download/#cli.
Windows installer walkthrough
The Windows download is a signed Inno Setup installer (anemos-gui_<version>_windows_amd64_installer.exe).
Running it opens the standard Setup wizard — accept the license, pick an install location, then confirm:
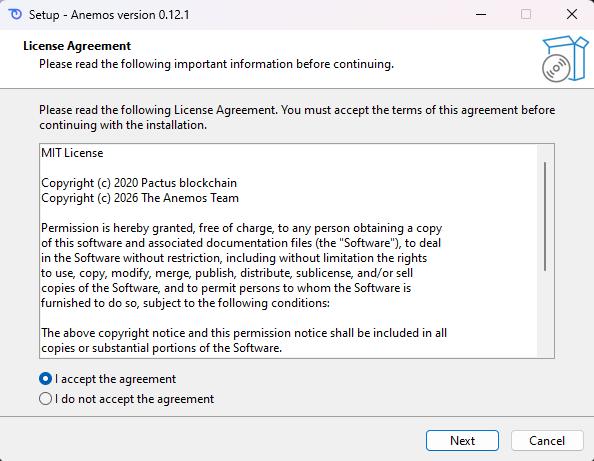
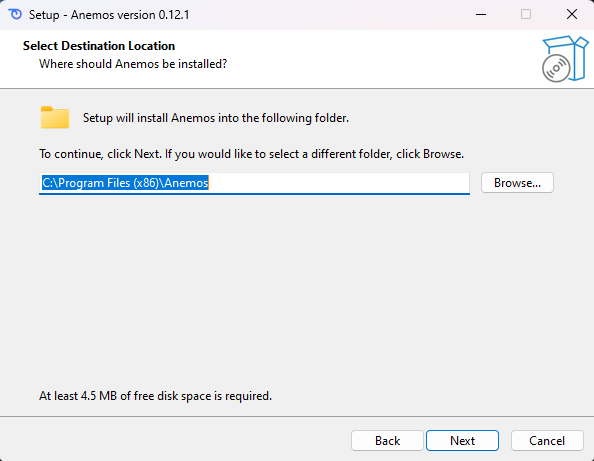
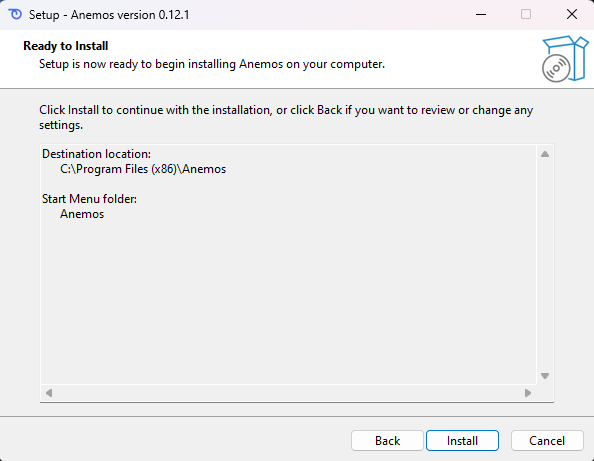
By default it installs to C:\Program Files (x86)\Anemos and adds Start Menu / Desktop shortcuts that
launch anemos-gui.exe --testnet. Once Setup finishes, the wizard walkthrough in Initializing below
applies.
macOS and Linux don’t have an equivalent OS-level installer wizard to screenshot: the macOS download is a
.dmg disk image — you drag the Anemos app icon into /Applications, there’s no multi-step wizard — and
the Linux download is a self-contained AppImage that you chmod +x and run directly, with no install step
at all. For both, the wizard walkthrough below is what you’ll see the first time you launch the app.
Alternative: build the desktop GUI from source
Most users should just download the pre-built GUI above. If you are a developer, or you need an
architecture that isn’t published, you can build the GTK desktop GUI yourself from the repository.
After installing the Go toolchain and the GTK build dependencies (see the project’s
docs/install.md), run from the repo root:
make build_guiThis produces ./build/anemos-gui. The wizard walkthrough below then applies to the GUI you built.
Initializing
When you run Anemos for the first time, a wizard dialog will appear to guide you through the wallet creation and initialization process. This process consists of several steps:
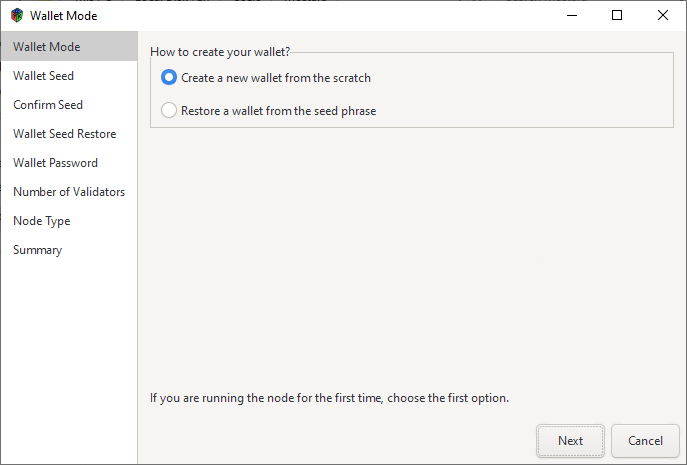
Wallet Mode
On the first page, you will be asked how you want to create your wallet. Select the option to “Create a new wallet from scratch” and proceed to the next page.
Wallet Seed
The next page will display your wallet seed phrase, which consists of 12 words. It is essential to securely back up this seed phrase, as it is required for wallet recovery in case your computer is lost, damaged, or stolen.
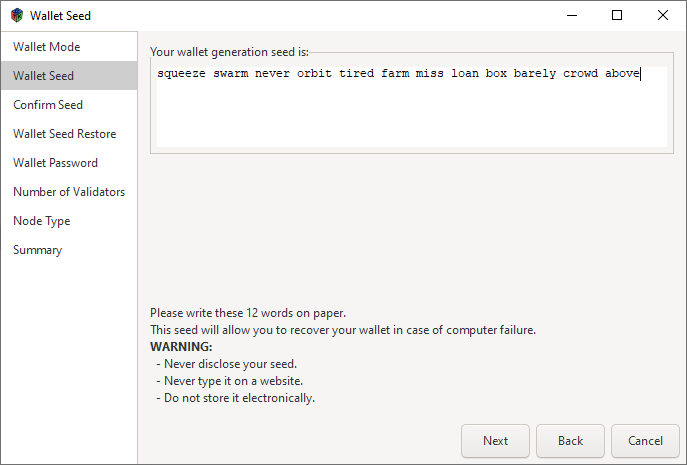
Always keep a paper backup of your seed phrase in a safe and secure location. If someone gains access to your seed phrase, they can gain full control over your wallet and funds.
Seed Confirmation
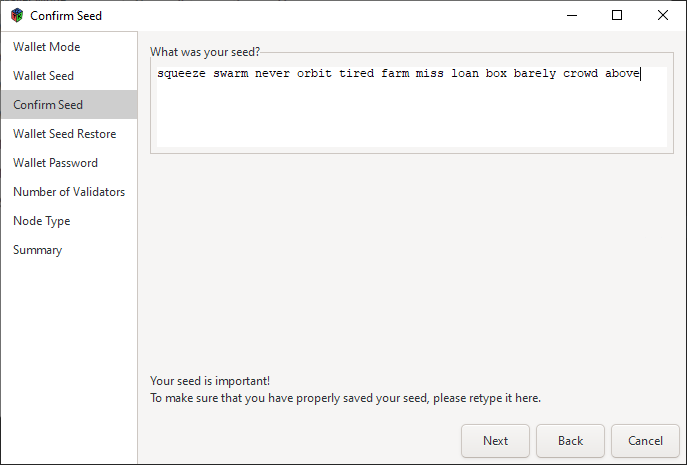
In this step, you will be asked to confirm your seed phrase. Input the 12 words you received in the previous step into the dialog. If the seed phrase is entered correctly, you will be able to proceed to the next page.
Wallet Password
On this page, you will be asked to set a password for your wallet. Enter a strong password in the first dialog box and confirm it in the second one. This password will be used to encrypt your wallet and protect it from unauthorized access.
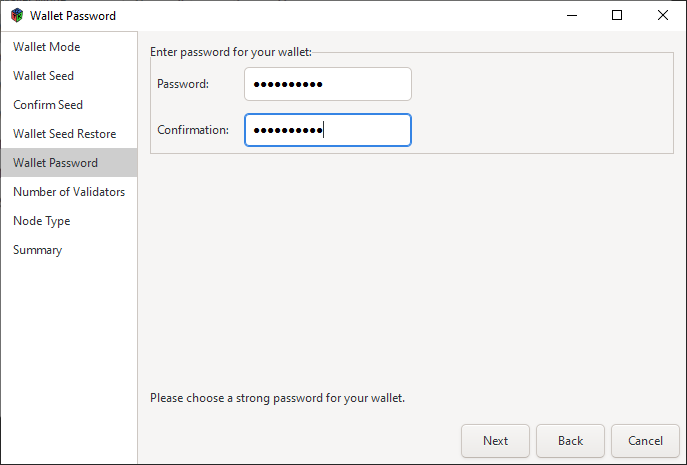
Note: Choose a strong password and keep it safe. If you forget or lose your password, you will need your seed phrase to regain access to your wallet.
Number of Validators
Each node in the Anemos blockchain can run up to 32 validators, and each validator can stake up to 60,000 ANM (the launch cap; supply-indexed at runtime). Here, you can define how many validators you want to create for your node. Select the number of validators based on the amount of coins you want to stake.
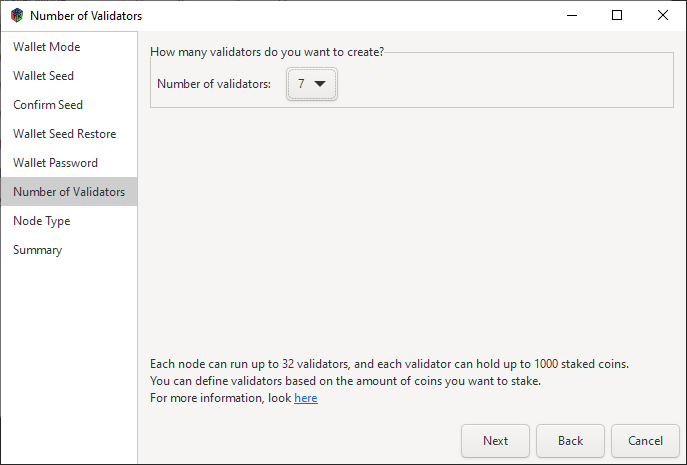
If you want to stake more than a single node’s combined validator capacity (32 × 60,000 ANM at the launch cap), you need to set up a new node.
Node Type
On this page, you choose the mode in which your node will operate: Full Mode or Pruned Mode. Both run the real node and validate every block — they differ only in how much history they keep on disk.
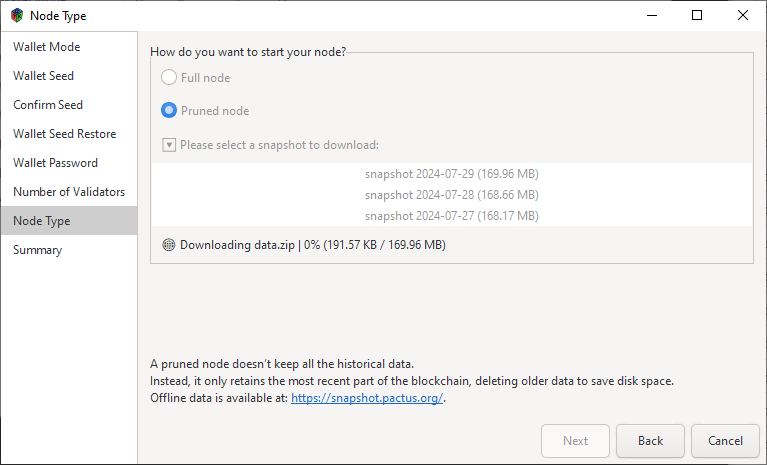
- Full Mode keeps the entire blockchain history. Choose it if you want a complete archival node.
- Pruned Mode keeps only the most recent blocks (the last 10 days by default, set by
store.retention_days) and deletes older data to save disk space, which also speeds up syncing. See Prune Your Anemos Node for details.
Both modes are fully supported — including on the Anemos Android app, where Full and Pruned are the same choice (pruned/light is the phone-friendly default, but a full node is selectable). Pick the mode that fits your storage; you can always re-prune a full node later.
Summary
The last page of the initialization process shows the node information, such as the working directory, validator address, and reward address. Review this information and click “Close” to complete the initialization process.
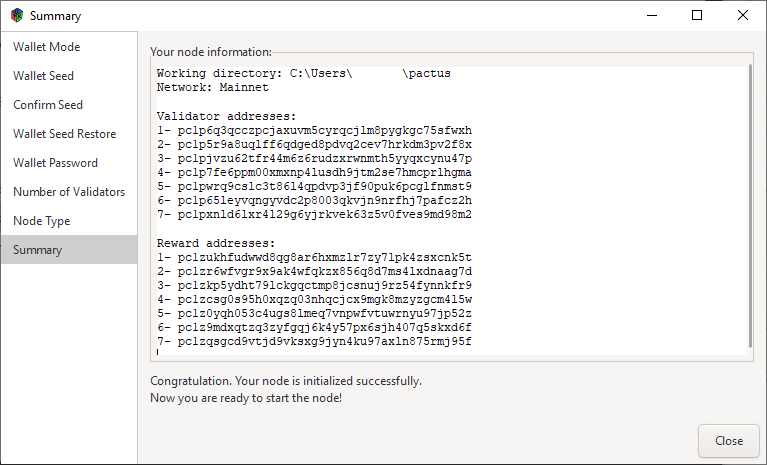
Upon closing the wizard dialog, your Anemos node will start running. You are now ready to use Anemos in GUI mode.
Running the Anemos Node
After completing the initialization process, you are ready to run the Anemos node. Running a Anemos node allows you to synchronize with the network, enabling you to manage your wallet and send transactions.
Syncing with the Network
When the Anemos node starts running, it begins syncing with the network. This process may take some time, as your node needs to download and verify the blockchain.
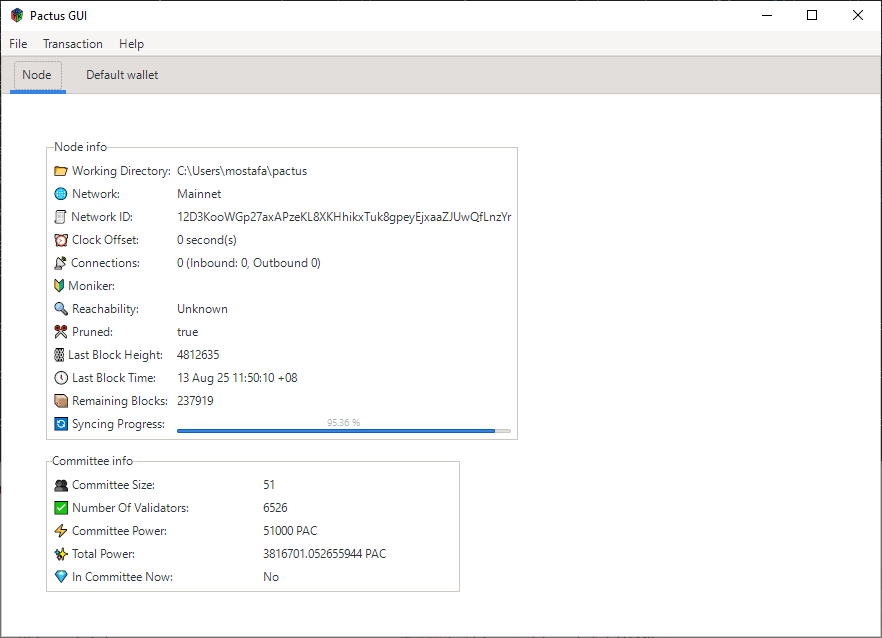
Your wallet — the Portfolio tab
You can check the Portfolio tab to access your default wallet’s information. Please note that the displayed information may not be accurate until the syncing process is complete.
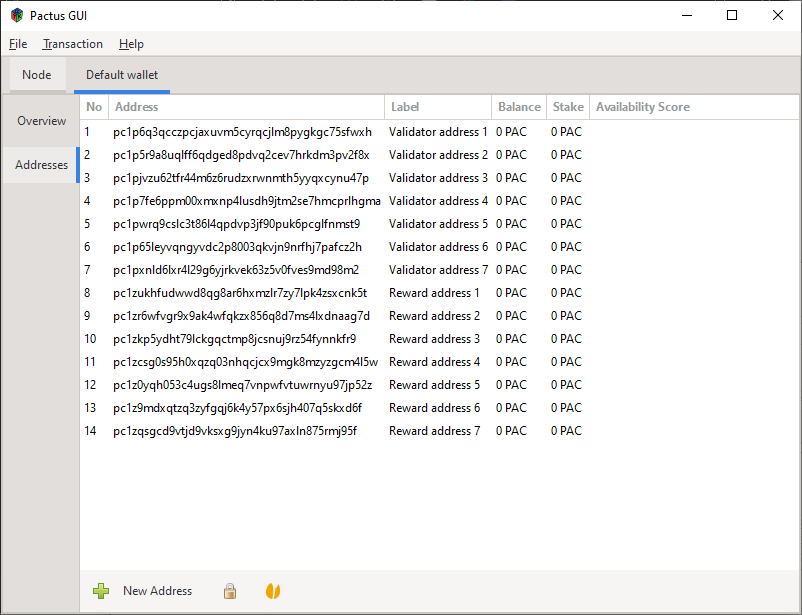
In the Portfolio tab, you can view your account details, including your balance and — under its Addresses section — address information such as the validator and reward addresses. Your computer acts as a node and is recognized by the validator address in the Anemos network. The reward address is the account address where you collect the rewards earned by participating in the consensus algorithm and proposing new blocks.
By running a Anemos node, you contribute to the decentralization and security of the Anemos blockchain network. Thank you for your participation!
Get Testnet ANM
Since the GUI connects to the Testnet (Mainnet is not launched yet — see the note at the top), your wallet starts empty and holds testnet ANM (tANM), which has no monetary value and is only for testing. To get some, copy your account address from the Portfolio tab and request funds from the public faucet at faucet.anemos.one. Once the faucet transaction confirms (and your node has finished syncing), the balance will appear in your wallet.
Testnet ANM (
tANM) exists only to exercise the network and has no value. It is not the
same as Mainnet ANM, which does not exist yet because Mainnet has not launched.